When the system is powered on, the BIOS will perform diagnostics and initialize system components, including the video system.
(This is self-evident when the screen first flicks before the Video Card header is displayed).
This is commonly referred as POST (Power-On Self Test).
Afterwards, the computer will proceed its final boot-up stage by calling the operating system.
Just before that, the user may interrupt to have access to SETUP.
To allow the user to alter the CMOS settings, the BIOS provides a little program, SETUP.
Usually, setup can be entered by pressing a special key combination (DEL, ESC, CTRL-ESC, or CRTL-ALT-ESC)
at boot time (Some BIOSes allow you to enter setup at any time by pressing CTRL-ALT-ESC).
The AMI BIOS is mostly entered by pressing the DEL key after resetting (CTRL-ALT-DEL) or powering up the computer.
You can bypass the extended CMOS settings by holding the key down during boot-up.
 Bio Mass
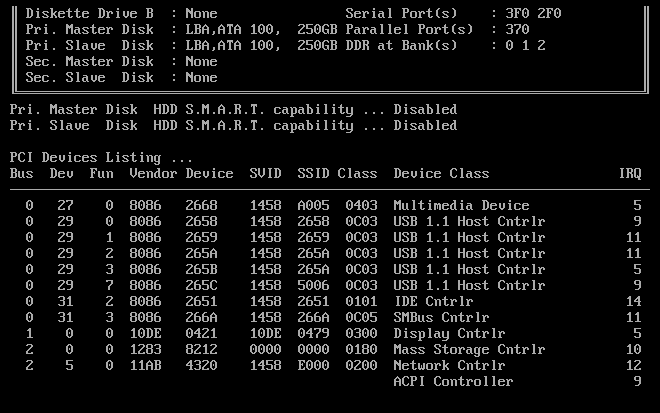 English: Part of a PC's power-on self-test (POST).
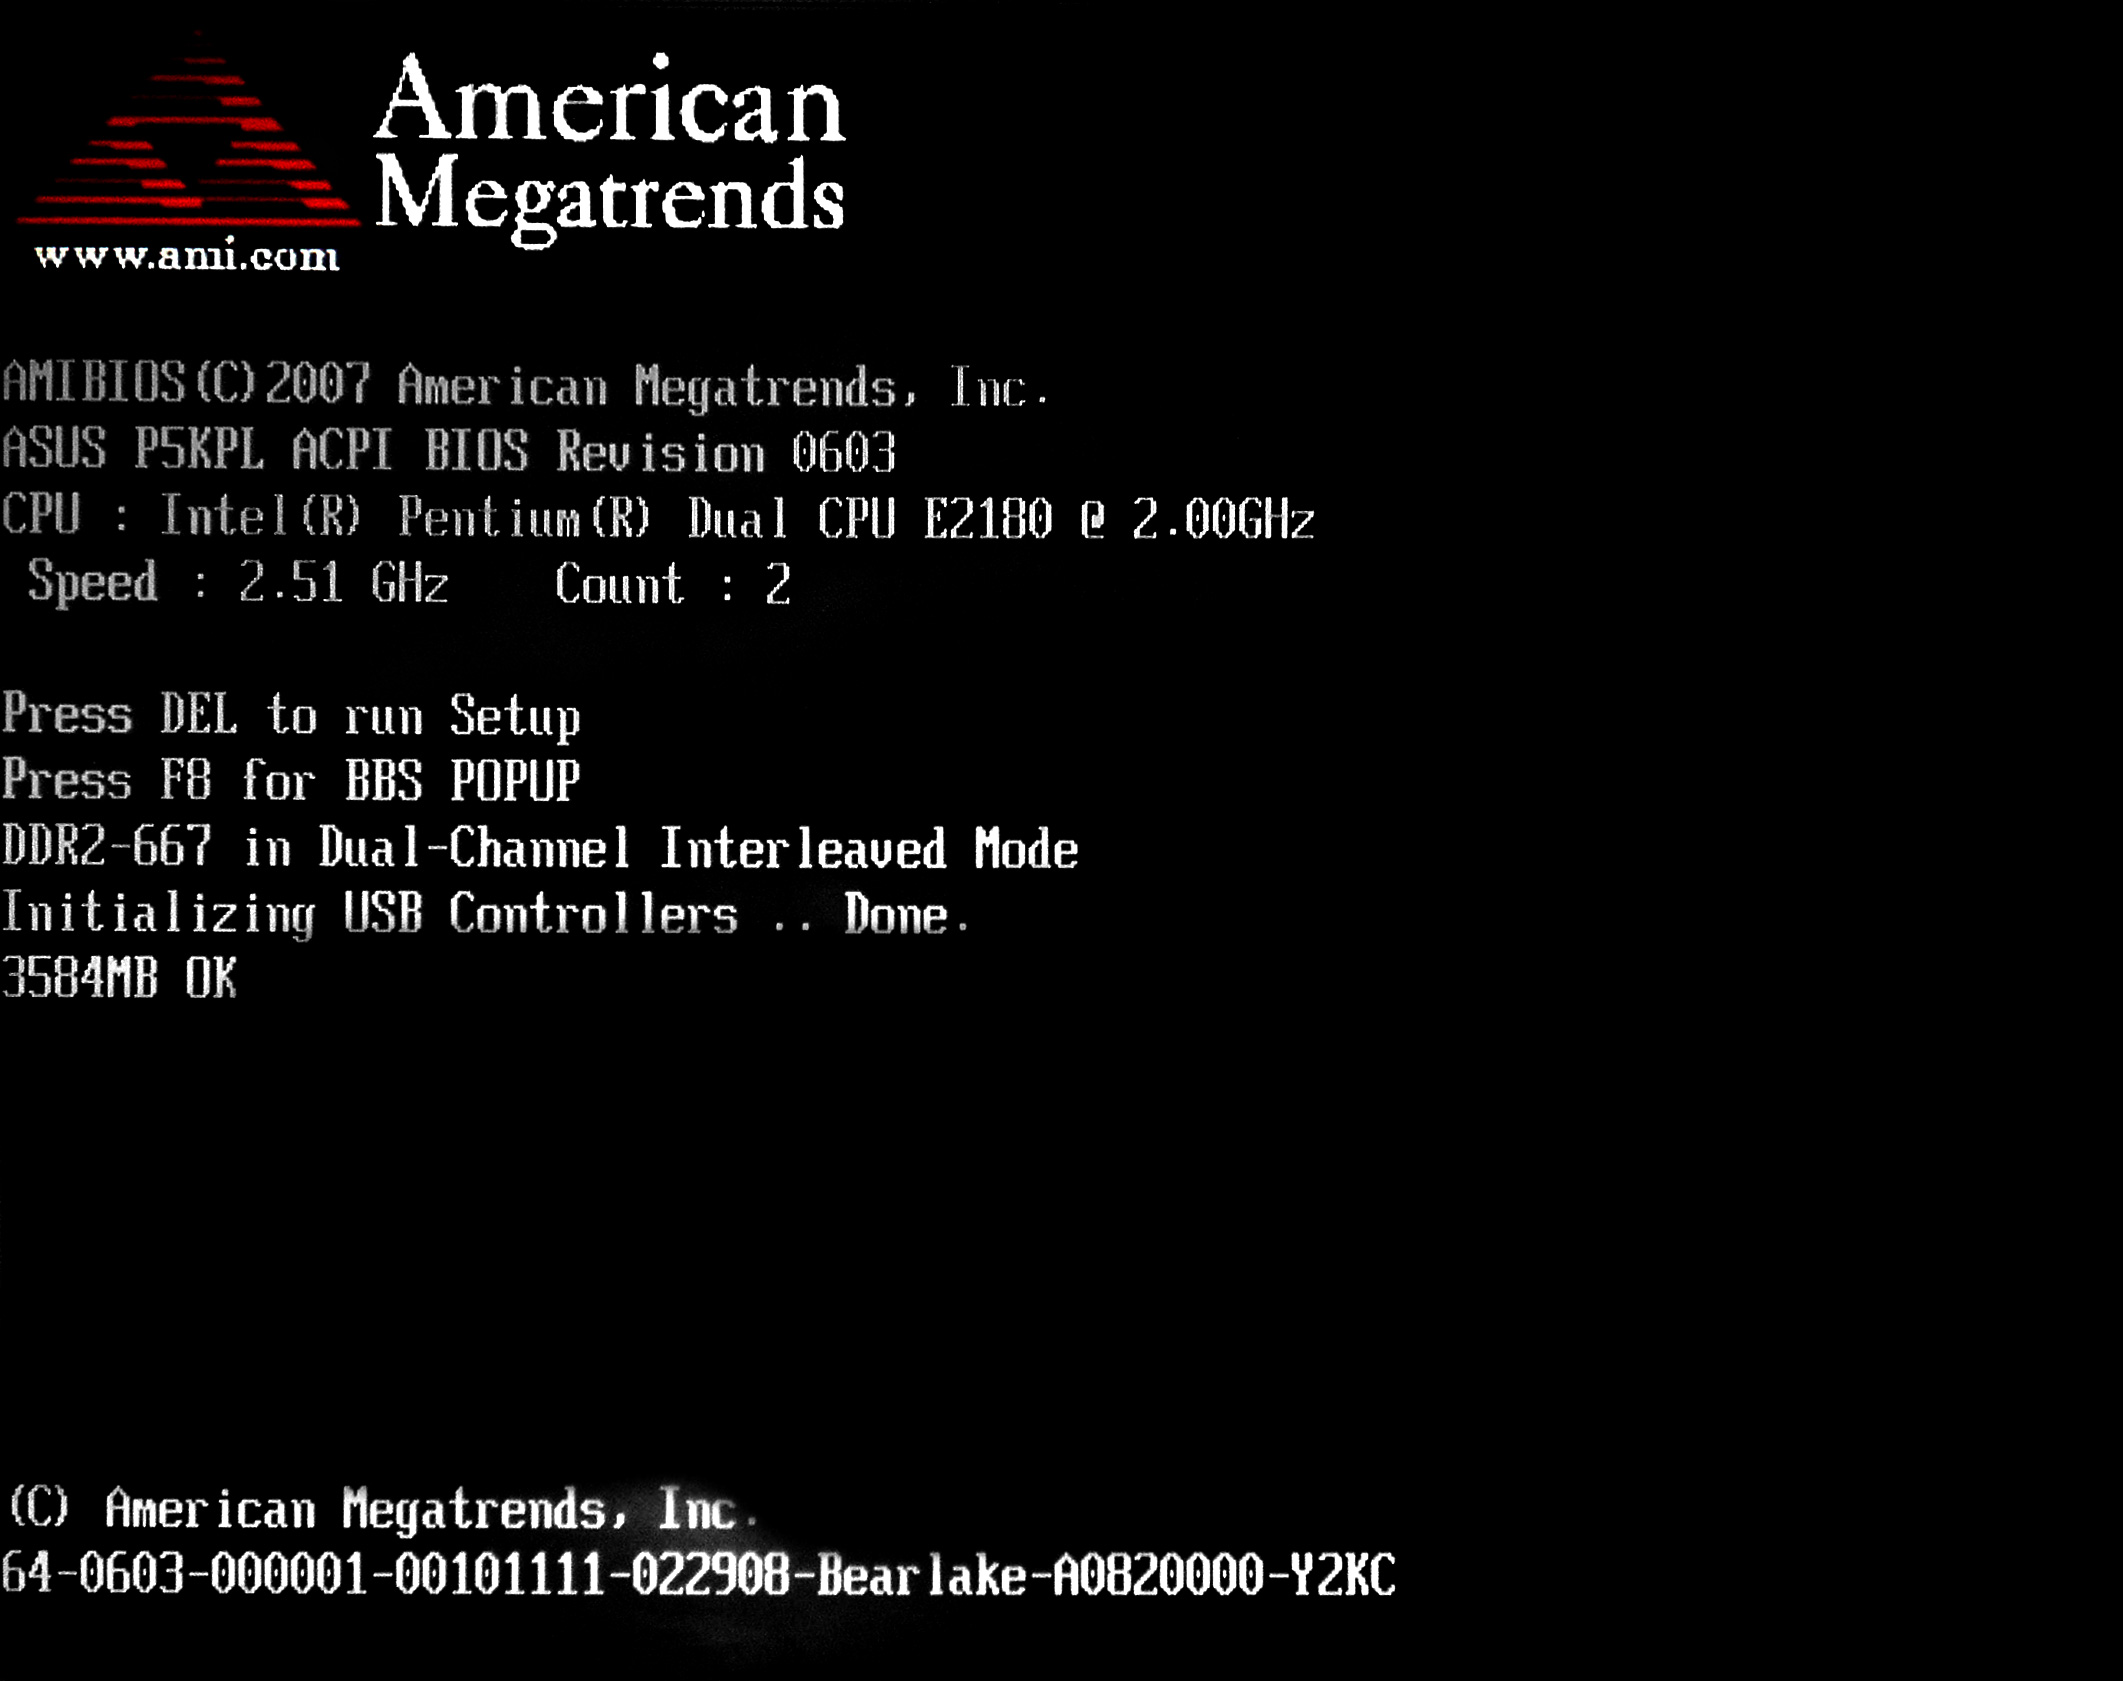 English: Power-on self test screen on a personal c...
This is really helpful,
especially if you bend the CMOS settings right out of shape and the computer won't boot properly
anymore. This is also a handy tip for people who play with the older AMI BIOSes with the XCMOS setup.
It allows changes directly to the chip registers with very little technical explanation.
A Typical BIOS POST Sequence
Most BIOS POST sequences occur along four stages:
1. Display some basic information about the video card like its brand, video BIOS version and video memory available.
2. Display the BIOS version and copyright notice in upper middle screen. You will see a large sequence of numbers at the bottom of the screen. This sequence is the .
3. Display memory count. You will also hear tick sounds if you have enabled it (see Memory Test Tick Sound section).
4. Once the POST have succeeded and the BIOS is...